About Me

I'm a freelance artist, designer and demonstrator and have been involved in arts and craft my whole life in one way or another. I design stamps for top British company Personal Impressions, under the "Lindsay Mason Designs" brand, as well as papers, templates and other crafting products. I'm a certified Ranger Educator and my first book,"Stamping", was published in 2009. I also design regular projects for Crafts Beautiful magazine and have made guest appearances from time to time on QVC. I've recently joined You Tube under the name of LindsayMason1000 where I'm posting short technique videos and you can buy my paintings and hand crafted pieces from my Etsy shop. My work takes me all around the country demonstrating stamping, papercrafts and general inkiness! When I'm not working, I love gardening, church & community activities, nature watching, journalling, music and theatre and just relaxing at home. Email me at: ljm.design1@virginmedia.com

Sunday 31 July 2011

Two counties weekend

Hi folks! It's been a very hot, and very fun weekend in Yorkshire and Cheshire. On Saturday I was at Samuel Taylor's in Leeds where I met quite a few familiar faces from when I was there last time, a few years back. I also saw Carol, who was the winner of my first blog quiz a few months ago....I will really try to get another quiz together before too long - promise!
No pictures from Saturday I'm afraid, as I forgot the camera, but I do have a couple to share with you from today when I was at HG Arts & Crafts in Brookside Garden centre in Poynton. It's the Garden Centre that I shared photos from a year and a half ago when David and I went there in the thick snow on his birthday. There is a miniature railway there and so there is also a lot of railway memorabilia, making for a very picturesque setting. My demonstration was in the "Party Suite" which is filled with railway signs etc as you can see here.
Childrens parties are held in here and there is a "throne" for the birthday boy or girl, which apparently also serves as a seat for Santa Claus when he visits the gardens. Needless to say, I was seated on the throne (no rude jokes please!) and when Sheila visited, wearing one of her trademark hats, I was promptly crowned and David took this snap! I was trying to maintain a "regal" expression, but couldn't keep a straight face! It was a really fun day and I hope you all enjoy your new inks, stamps and card. Welcome to the new followers too...keep an eye open for the next quiz as there will be prizes!
Well, it's been a busy week and a half, so I shall sign off now and report back soon...hopefully with questions and goodies to be won. Hope everyone had a great weekend.

Friday 29 July 2011

What's on this weekend

Well, it's been a dull old day here today, but really warm and clammy. I've spent today making extra samples for this weekend's demonstrations. I'll be at Samuel Taylor's in Leeds tomorrow and then at H G Arts & Crafts on Sunday, which is at Brookside Garden Centre, in Poynton. I'll be stamping, staining, punching and inking...bit of all sorts really! Hope to see some of you at one or other event if you are nearby.
I forgot to post these next two photos the other day....they are of a project that I have in the current issue of Crafts Beautiful magazine. I used the gorgeous Flora and Fauna range from K&Co and, when I received the papers and matching stickers, Grand Adhesions, borders etc I just couldn't decide which ones to use! So, I decided that a configurations box would give me the leeway to use a good mixture! I had so much fun making this, filling corked vials with flower seeds and making tiny labels for them and cramming as many details into, and around the compartments as I could. I didn't use tissue tape for covering the box edges (except for the main frame of the lid) but, instead, I used strips of the K&Co paper to keep the theme going.
I made a matching card and tag as well - the card features MS punches - a deep edge Punch Around the Page set "Wildflowers, and the Punch All Over the Page butterfly. I had to add some Tissue Tape frills to the tag of course!
Hope you like them, and if you'd like the instructions and to see much better photos of them do check out Crafts Beautiful...they photograph everything so well.
There are still a few places on the August 14th Early Christmas workshops that I'll be teaching in St Helens...we'll be using some of my new Christmas stamps and I'll also be demonstrating with these the day before at Crafts 4 U 2 Do. This will be the first showcasing of my new stamps, so I'll be busy getting cards etc made with them next week - can't wait to start on them! (Nice chance to unlock the glitter cabinet!)
I must share a picture with you of two teeny tiny, ever so sweet fairies that I was given by the wonderfully talented Kath.
My photo just doesn't do justice to them, as they are very delicate and measure only about an inch across - if that! The detail on the faces is brilliant and the hair (in ringlets no less!) is incredible. The edges of the tiny wings are even glittered. Thank you Kath. I have earmarked one fairy to sit inside a corked vial in my next configuration box - will show you when I have done it.
Well, time to sign out now and have a few quiet hours before retiring. Have to be up early for the trip over to Leeds tomorrow. Hope everyone has a great weekend!

Tuesday 26 July 2011

Pictures to show!

Hello all, it's been a good few days since my last post as family things have been taking precedence over the last week or so. I hope to make up for it with a fairly long post now, with some great pictures too! This time last week was my birthday and I received some lovely cards and gifts from very kind friends... ....clockwise from the back are a gorgeous canvas that the lovely Joanne made especially for me, next to that is a decorated jar filled with chocolates and labelled "Lindsay's very own chocolate treats jar"! This was from Chris but I must confess that David is munching on one of the bars as I type!!! Next to the jar is a lovely card that Joanne sent me - not for my birthday as such, but thought I'd include it anyway! Below that is a beautiful card sent to me by Gez . At the bottom is a gorgeous felted card from Chris which has a lovely heart shaped felted brooch attached to it. The teeny canvas is from Joanne and "T" and has a delicate, and very pretty heart pendant secured to it. In the centre is a dragonfly beaded box containing a really sweet silver cat wine stopper, also from Joanne and "T". Thank you so much ladies (and "T"!) for your kindness and wonderful creative generosity. Below is the birthday card that Joanne made for me...hard to see the dimension in this photo. Although I had a busy schedule David insisted we went out for the afternoon and we ended up, after a lovely drive around nowhere in particular, in Alsager, Cheshire, where we came upon a well hiden gem called "The Old Mill". It was a quiet, old Inn complete with mill pond. We had a delicious meal (the chips were home made - not frozen! Crikey, that's a rare thing these days!) which the resident black labrador would have happily cleared of any remains! Afterwards we wandered out to the mill pond and, as we had seen a large fish leaping out of the water before we ate, I threw some breadcrumbs onto the surface. They immediately attracted quite a few large Carp and we were treated to the sight of them coming right out of the water to grab the bread. Made a change from feeding ducks! If you are ever near the area we can recommend a visit. So it was a lovely birthday, topped off with beautiful red roses from David. Now, as promised, here are pictures of the Chunky Book which I received the Saturday before last from Sheila when we last met at my workshops in St Helens. Sheila did a great job of putting the books together despite the setbacks of a couple of people having to drop out of the swap and some of us (including me!) having to ask for a time extension to get pages made! Everyone involved chose the theme they would like for their book and here is mine - I chose "The magic of water". Here is the front cover...Sheila made all the front and back covers herself. Here are the inside pages - each picture shows the back of the previous one as well as the next page. The first one is this stunning piece by Joanne, which has so much detail and depth to it. I can't even imagine how long this must have taken to put together, never mind thinking of the design in the first place! The next picture shows one of Sheila's pages...Sheila knows my favourite colours that's for sure, and the sentiments on this page are very appropriate just now. The Glossy Accents just emphasises the watery feel. Gez made this next page which is so well thought out and very evocative of sunny days by the sea. I love the colours here too. Next up is my own page which I used Colourwash dyes to make the background for. I drew, coloured and cut out the Mermaid, strengthening her with Glossy Accents. Next is another page by Sheila featuring another Mermaid. The faux bleached water effects on here are so effective and I love the colour combinations. A different Mermaid here on this page made by Elaine. I love Mermaids, so the more the merrier and this one is certainly unlike the rest! I love this shimmery aqua page. This nostalgic page was created by Karen and really captures the feel of a day at the beach. This dreamy page is by Sonja and I really like the way she has got that foamy quality of a crashing sea as well as the quote from Cristopher Columbus. Zoe's page is full of texture and contrast and I especially like the shiny fibres that tumble down into the Koi pond below. Hilda made this very different page which has subtle stamping and a great dictionary panel - I love dictionary definitions! The last page is by Cheryl - great colour and the paddling foot made me smile! Here is the inside back of the book. Well, hope you enjoyed looking at the Chunky Book which I will treasure. It was a labour of love for all involved!
Last Saturday I was at Crafts U Love, in Charlwood, Horley, for their fifth birthday celebrations. It was a day of classes and demonstrations and everyone had a lovely time. Hello to all the ladies I met there (no men I'm afraid!) and hope to see you again soon!
Well, I hope I have made up for my recent lack of posting and will try to post again before the weekend.

Thursday 21 July 2011

Very quick post

I was going to post pictures of some of the lovely cards and gifts that I was given for my birthday on Tuesday, as well as the pages of my chunky book that Sheila gave me on Saturday, but things haven't gone as they were planned this week I'm afraid.
So, this is just a quick post to say that I will share pictures and tales of the upcoming weekend when I get back from Surrey. I'll be at Crafts U Love on Saturday for their fifth birthday event. There are workshops and demos at the shop and at Charlwood Parish Hall, so I'm looking forward to seeing everyone. I'm tootling down there tomorrow...my favourite thing, going through the London Underground, but I am getting better at it!
For those who have been asking, there are a couple more of the workshop projects up on the Personal Impressions website now, and there will be more to come - with bothy supplies lists and full instructions.
Okay, there are two fishcakes in the oven with my name on them (amazing what you can buy these days!) so I had better get them before they disappear in a puff of charred smoke! Have a great weekend everyone, and I'll be back here next week.

Sunday 17 July 2011

A weekend of contrasts

Saturday was the first of my new workshops in St Helens and it was certainly a good day to be inside crafting as the Heavens opened and it poured with rain almost the entire time. David and I were there bright (mmm that's debatable!) and early getting everything ready before everyone began arriving in various states of drenchedness!
David got everyone settled in with drinks and biccies and then we got straight to work with alcohol inks and Stazon spray cleaner. You can bet that the tables didn't stay as tidy as this for too long! This was the first card that we made in the morning. Everyone made an alcohol ink monoprint and then spritzed it with Stazon before heating the card to make the white speckles appear. The ladies all used a variety of colours, so the results all differed tremendously, some being light and airy, others more dark and brooding. There were a mixture of my fairy silhouette stamps and various trees and flowers etc for stamping over the surface. A little white pen detail just adds some highlights to the silhouettes. The next card hasn't shown up too well in this photo, but was achieved by stamping the images onto old book paper with a Watermark ink pad and embossing with clear powder. Distress Stains were stroked across the page to colour the background before covering the images with brown paper and ironing over the surface to remove the shiny raised areas which leaves a lovely bleached effect. We finished the morning session with a small card using Stains and Perfect Pearl Mists to create a sky background and used my Castle ATC stamp as the focal image. The moon was just a punched circle which was backed with sticky backed adhesive sheet rubbed over with fine glitter. After lunch it was straight back into getting messy! I think this was everyone's favourite card of the day! We used the Tim Holtz Kraft Resist stash to create the background and flowers which had been coloured with Stains and spritzed with perfect Pearl Mists. The velvet leaves were also coloured with Distress Stains. Here are Kath and Elaine with their versions of our second card of the afternoon which focussed on Tissue Tape and ribbon. They were enjoying the day - honestly!!! Here's the sample card which doesn't look as pretty as the ones everyone made...I used quite a dark tissue tape as I wanted to leave the lighter ones for the ladies to use. I think I'll replace my flower with a new one to give a softer look. Here are Melanie and Jacqui with their cards - love this photo! We finished the day by making a tag...I'd thought everyone might be a little weary by this time, so something less complex was called for! We used the Stains directly onto Darkroom Door silhouette flower stamps to create watercolour effects - the great thing is that you don't need to spritz them or breathe on them to reactivate the ink. This will be even more fun when the next 24 colours come out - soon! My top tip here was to use the edge of a piece of card dipped into Stains ink to stamp grass at the bottom of the tag. Well, that is a quick run through of yesterday's workshop! Everyone had great fun including me and David! I worked everyone quite hard, so hope all of you are recovered now! It was great to meet up with everyone that we haven't seen for ages and also to get to know new crafting friends. Sheila brought the Chunky books that she had brilliantly put together for me and Heather - they are just gorgeous and I will be photographing mine and posting the pictures to share with you on here. Thank you Sheila and everyone who made the pages.
The cards and tag are, or will be, featured on the Personal Impressions website under the projects section along with a product list and full instructions for each one.
After yesterday's busy day we were ready for a quiet day. It has been raining all day and I spent most of this afternoon with tears running down my face! We switched on Sky Arts and were treated to a concert by André Rieu which was a mixture of very rousing, jolly music and some tender songs which had a tear jerking effect. These concerts (which seem to be on each Sunday at the moment) are set in a different European city each time and are in the open air. They are so uplifting because there are hundreds, if not thousands of people singing along, dancing and generally having a wonderful time....I always imagine a world wide concert where everybody is joining in together at the same time. I know it won't ever happen, but it's a lovely thing to imagine. Immediately after the concert there was a new(ish) production of Tosca from the New York Metropolitan opera house. It's my favourite opera and was beautifully sung and acted so, I was awash with tears almost the whole afternoon!
It's been a lovely weekend of contrasts - busy, busy and full of laughter on Saturday and filled with music and tears today!
I'll just finish by showing you the stunning card which Joanne sent to me to wish us luck with the new workshops. The background is even better than it looks here! Thank you Joanne!
Right, I had better sign off now - will be back with photos of the chunky book pages next week.

Friday 15 July 2011

My Friday post

I'm just popping on to wish everyone a lovely weekend and to say that we're really looking forward to seeing everyone who's coming to tomorrow's workshop.
Everything's prepped and packed (I hope!) so we're ready for a fun, but busy day. I'll post pictures of the day next week. David will be multitasking as chauffeur, glamorous assistant, official photographer and kettle boiler....there'll be nothing left for me to do!

Here is a piccie of cheeky Thomas overseeing that I have put everything into the bags and checking my emails. He pretends to be a tough cookie by the way, but he dithers about every time he goes out or comes in, as he has an obsession with staring at the corners of doorways when the doors are opening or closing! Not sure what he expects to see, but he is apt to jump out of his skin if he's going through a doorway....what a hero!
And here is a photo of last Saturday's demonstration at Card-io in Wigan - it was a busy old day. Hello to everyone that popped by. I think the weather is due to break this weekend, which may be no bad thing as, at least here, it's dull but airless. I just fancy a bit of rain to freshen things up!
Finally, thank you so much to Joanne who sent me the loveliest card to wish us well with the new workshops. It was so thoughtful and it's a beautiful card which I'll share with you next week.
Have a great weekend everyone!

Tuesday 12 July 2011

Workshops update

Morning everyone. Just a quick post with an update on my workshops....

This Saturday's all day workshop is now full, so look forward to seeing everyone and having a fun day of creativity.


"Early Christmas Crafting" on Sunday 14th August:

10am - 12.30pm session - there are still places available

1.30pm - 4pm session (repeat of the morning class) - some places available but filling up fast

£15 per session


"Full on Christmas" all day workshops on Sunday 11th September

10am - 4pm with an hour for lunch and shopping!

Only three places left!

£30 for the day

If you'd like to book on any of the above, please email me for more details.
I'll post pictures from this coming Saturday's workshops next week of course.

Sunday 10 July 2011

Round two

I don't know if anyone else is having problems posting, but Blogger is being very stroppy with me over the last couple of days and error messages keep popping up all over the place. Gggrrr...just taken me ages to upload these photos. My followers list has vanished as well. Still, I suppose we just take all this technology for granted these days, and forget just how remarkable it is that we can all share our thoughts, experiences and pictures across the world without very much effort at all. So - I will retract my grumble hencewith!
Thank you for all the positive comments and emails about the designs I posted yesterday. Here are the second round of new images......
This A6 clear set is called "Nativity Unto us a Child" PICSA6258. My castles stamps have been so popular, that I decided to create a Nativity set that included some Minarets to give the same versatility in building a scene. Of course, the Minarets can be used beyond Christmas to make general fantasy castles.
Next is another A6 clear set which I hope you'll find useful. It's "Silent Night" PICSA6263 and has fourteen handy texts and messages in various styles. I really hope that this next set will make you smile! This is A6 clear set " 'Ave an Elfy Christmas!" PICSA6260 and you can tell from the title and the messages on the set that I can see lots of uses beyond Christmas for these characters....and lots of terrible puns! The last of the clear A6 sets is another verse one called "Why do I bother?" PICSA6264. This one has a humourous three verse poem that may ring a bell with mums, or anyone who knows a busy mum! There are also two useful, more simple verses that are perfect for inserts or even on the front of a card. The next design is an unmounted rubber single stamp entitled "Christmas Village Collage" PIRS027. Again, this one can be used as a full image or the individual elements can be snipped out and used seperately. The last picture is of "Jolly Holly" PICSA6265. This is a whimsical mix of "curly" Christmas images and a happy snow couple. I am envisaging a long row of the stockings in an array of lovely colours....watch this space! Well, I hope you enjoyed looking at the festive designs and I will post examples of how I've used them as soon as I can. Now I am looking back up at the windows and seeing the summer sun streaming in and it does seem odd after just posting about chilly winter Christmas images!
Quite a few of you have been asking about Thomas, so I can say that he is well and truly settled in now, has been upgraded from the less expensive supermarket's own brand cat foods to the "good stuff", has just about killed all his toys, is taking up most of the bed and is still under training to stop stalking the birds at the window!
The squirrel is still demanding to be fed by tapping on the window and he has just had a treat of a mini Snickers from a box of Celebrations! Squirrels love chocolate and, of course, this had nuts in it too! Don't worry - I don't regularly give him sweet treats, and it won't do him any harm, though he may run around the trees a little more quickly for the next fifteen minutes...lol!!
Right, that's me done for today. Hope you have all had a lovely weekend and looking forward to seeing some of you next Saturday for the first of my new workshops!

Saturday 9 July 2011

Sneaky Festive peeks!

It's been a lovely day at Card-Io today...hello to everyone who came along and apologies for burning holes in your pockets and purses! Hope you all have fun with your new stamps, papers and inks though.
I don't have pictures of finished pieces tonight, but I do have sneaky peeks of some of my new Christmas stamp designs. These should be available from the end of July/beginning of August, so if you did want to pre-order any of them, just ask your local Personal Impressions stockist. If you want to see more of P.I.'s latest designs, check out the website at www.personalimpressions.com, click onto "products" and then "Art Stamps" where you can look through all the various sections and designers. To browse my designs, click "products" then scroll down to my section "Lindsay Mason Designs".
So, here are just a selection of them. This first one is an A6 clear set entitled "Christmas Bunting & Baubles" PICSA6262. Sorry that the bunting is upside down, but sometimes things have to be turned around to fit them on the stamp sheets! Of course there is a snowman in this set as I get asked for new ones every year!
Next is another A6 clear set which is called "Build a Snowy Scene" PICSA6261. This one is in response to requests for the tree stumps and fences etc that I add to my Distress inked backgrounds with water spritzed snow. You'll be able to make a whole range of different wintery landscapes with this set of images without worrying about drawing in pesky fence posts yourself! The next design is an unmounted rubber single stamp entitled "Snowy Circle Collage" PIRS025. The unmounted rubber designs all have coloured images on the packaging, but I don't have those to show you, only the black and white ones. Hopefully this one will please the snowman fans again! Next is another A6 clear stamp set called "Angelic Christmas Trees" PICSA6259 - I've turned this image sideways so you can see the Angel properly. Some of you may recognise her as being very similar to the Angel that I drew for my own Christmas cards last year and I had lots of requests to design her as a stamp. Finally, for this first sneak peek, here is another unmounted rubber single stamp called "Christmas Collage" PIRS027 - again, the packaging for this stamp has a coloured image of the design. This one can be used as a flat image, decoupaged or elements stamped, coloured and cut out to use on their own. I'll show some more of the new designs over the next couple of days and will be making some sample pieces with them over the next few weeks that I'll post on here.
I have taken on board the many comments on here, by email and in person, to design some of my quirky Art Journal images into stamps, so will see what can be done and will keep you posted!
Have a great Sunday everyone - think it could be another nice day.

Thursday 7 July 2011

Journal pages

Just a quick post in between doing other things, but I promised to show you the finished Mermaid Journal page, so here she is.... hope you like her. I kept the page very soft by using hardly any penwork at all. All the colouring is done with pencil crayons and the outlining is plain lead pencil. I did use a black fineliner pen on the eyes to bring them more to life and I also used a white pen to add one or two highlights. I'd wanted to add some gold leaf highlights too but, typically, couldn't find where I had last put my leaf metal sheets! I did find some home decor stickers that I got from a car boot sale years ago - they are clear, sticky backed panels with random gold areas on them. So, I cut out a few teeny tiny pieces and adhered them to the Mermaid's tail and some of the fish! They took forever, being so fiddly, so I decided to leave things as they are and will add some more gold when my leaf sheets turn up!
I bought an old book called "Aeronautical Engineering" from a charity shop a few weeks ago...it has lots of diagrams that I thought had a steampunky look. I took a couple of pages that caught my eye and, after tearing them down a bit, stuck them into my journal with plain old glue stick. I used a Ranger Snow Cap paint dabber to work over the pages, leaving some areas exposed. When I'd seen these headings in the book I knew that I wanted to use them as they were really appropriate to how I have been feeling! In case you can't zoom in, the headings are "Overhaul", "Inertia Starter" and "Overhaul Carried Out"! I used my Neocolour Watersoluble crayons to scribble black and two shades of red lightly over the surface before using a damp brush to blend them together. This technique let me keep the words as visible as I wanted. It's surprising how little actual colour you need to apply to be able to wash a nice background over a two page spread.
So, here's the finished page...I don't feel like the overhaul has been carried out yet, so I wrote "Must Have" above it and drew a sign underneath stating "Urgent!". I drew the robot with a fineliner black pen and added some shading with grey Promarkers and used a red for some of the loose wires and the buttons. I drew in the cogs and nuts that are falling out of "my" ear with the fine pen, again, shaded with grey. I added the random border with a Sharpie black pen and finally used a white pen to add a few highlights here and there. I don't feel rebooted yet, but creating this spread did make me smile inside!
I'll be sure to bring my Journal with me on Saturday, so if you are coming along to Card-io, in Wigan, feel free to have a closer look!

Tuesday 5 July 2011

The lone stranger returns!

Apologies that I haven't blogged for over a week but I've been caught up with family things and haven't really felt chatty enough to post anything. You know how it can be sometimes, when you just want to batten down the hatches for a while. Anyway, I thought I'd pop on here before bed time, so am sitting here at just gone 11pm with windows open and the fan on, it's still so muggy!
Hello to new readers and followers that I met last weekend, or do I mean the weekend before?! A week last Saturday I was at Crafty Addicts in Chorley where I had a really fun day as everyone who comes to this shop seems to have a great sense of humour! The day just flew by and I didn't even get chance to take any snaps.
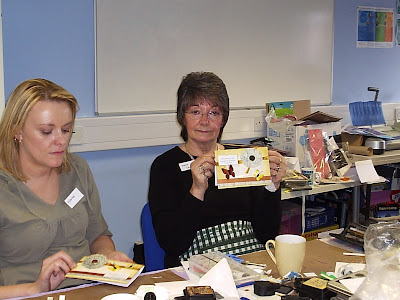
Next day was spent at Stamper's Gallery in Tarleton where I had another very busy day. This time David took a few piccies and here's one with some very concentrating faces...and David's finger too! It was another scorcher of a day, so it was lovely to see so many people choosing to come along rather than stretching out in the garden with a long cool drink! Actually, I think that everyone here was just wishing that I'd spritz them with cold water instead of my card!
Last weekend I had a trip down to Farnham, in Surrey which turned out to be a very pretty town full of lots of lovely buildings and little nicky nacky noo lanes....he he, my sister Heather laughed so much when I described the roads like that, that she told me to include it on my blog! I had a nice journey down on the train and had a good look at a teeny fox cub staring up at me from the verge along the railway line. He was quite bold! I spent a good few hours wandering round Farnham in the afternoon and evening, including the very pretty park where there were lots of children in the water with those colourful fishing nets...a really nostalgic sight that made me feel like joining in! I did take pictures of a large family of downy ducklings with their mum and dad, lots of fish in the stream (yes, the water was so clean that I could see them) and my first ever real life sighting of a beautiful Grey Wagtail, which is much more colourful than its name suggests, being a lovely lemon yellow beneath a soft grey head and back. Unfortunately, the photos are too blurry to be worth sharing!
Next day I was at Squires Garden centre as part of their Craft Live event. This was held in a large marquee - great fun!
Here's a shot of my table with a huge display of Idealogy goodies to the side. Hello to everyone that I met there and hope to see you again next time I'm down that way. Here's one of the cards that I made on the day....I don't always finish cards on the day, but this was one that I worked on with a few different techniques and then put together bit by bit. The rosette is made using Tissue Tape of course...I've found that the rosettes take some practice but the results are worth the effort I think. A bit of talc behind the frills really does help to keep the shape and stop the tape going flat. Sorry about the rather dodgy backdrop! I've been working from home all this week and have done a little bit more journalling, though nothing's completed yet. I've gessoed a few pages and coloured some backgrounds so am now seeing what develops. I don't often have an idea until I start - I like to just let my hand, complete with pencil, start wandering over the pages and surprise myself! This background really pleased me, though you can't see the colours and textures too well here. What started to emerge was a watery feel and this Mermaid soon followed. I am still in the process of colouring, with pencil crayons this time, and then will add some more details, though not too many as I want the page to have a dreamy quality. I may well add some gilding at a later stage. I'll be sure to post a picture of the finished page.
Today was nice as I saw my new Christmas stamp sets for the first time. I'll be sure to give you some sneaky peeks as soon as I'm allowed to!
Well, I had better sign off as a refreshing shower and then bed are calling. Hope to see some of you at Card-io, in Wigan on Saturday!